Tuesday, September 27, 2011

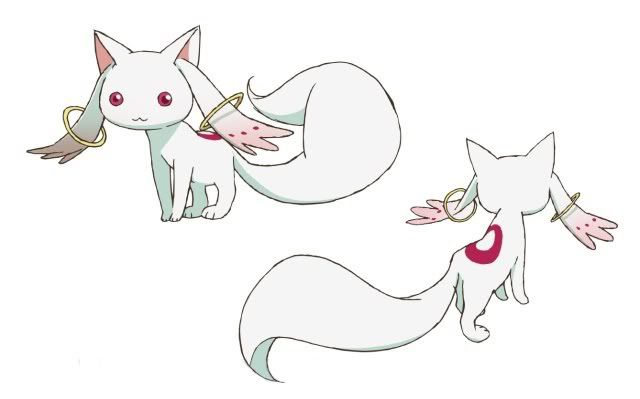
Kyubey (Puella Magi Madoka Magica)

Photobucket

I had been meaning to make this for a long while now. I haven't seen the series yet, but Kyubey's design really drew me in. I wanted to attempt it, but never really had the time. Finally I had someone commission me for him and I was excited to work on him.
Photobucket

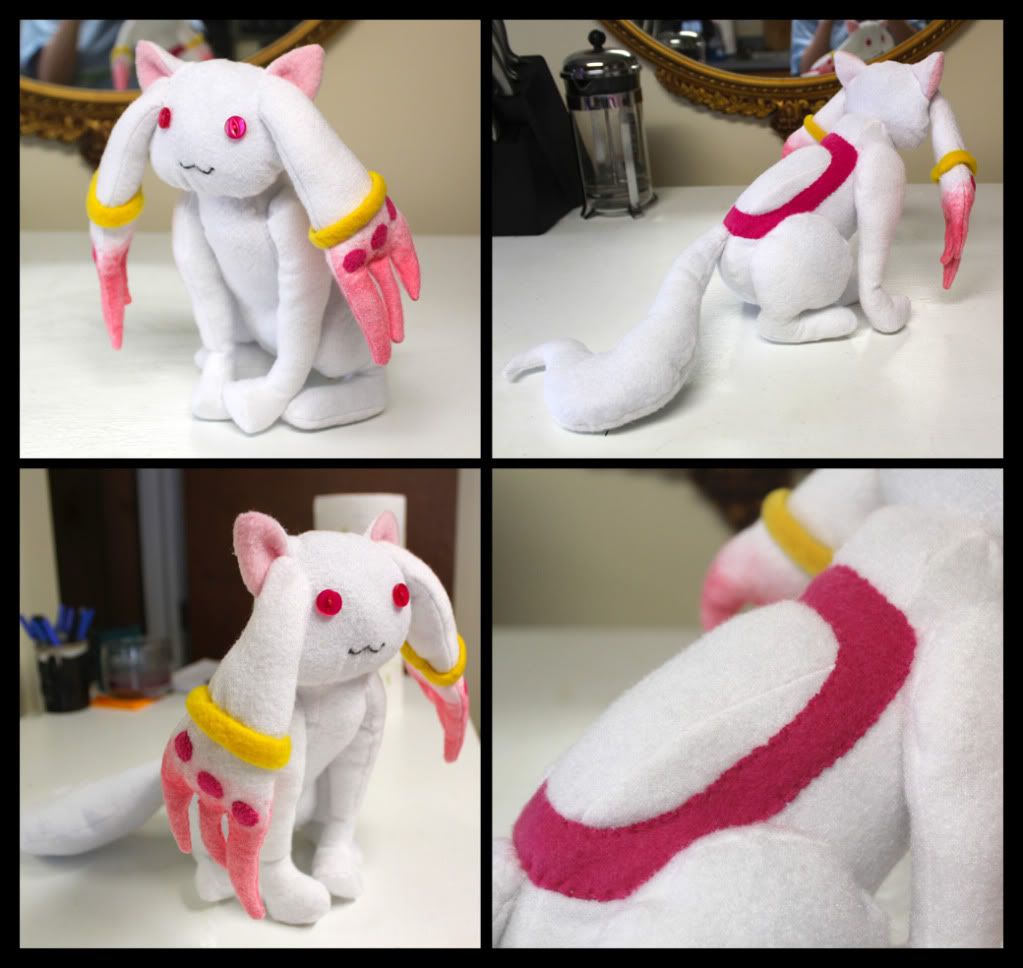
His body was really easy. It was a simple, slender shape. Rather then keep the arms and legs attached, I chose to make them separate. Felt it was easier to control how thin they were and how I could stuff them. I think the part I'm most happy about is how I was able to create the gradient on the ear parts. It was pretty easy to do. I just lightly colored over with a marker, until I got the gradient look that I wanted.

Originally I was planning on getting gold rings for his ears, but I never really found one that I liked. So I ended up just using fabric to make the rings. But it works out, because then I don't have to worry about them moving around. He sits pretty wonderfully. I'm a little sad I have to give him up to the client now!

As a side note, I'm starting to accept and post client photos with their plushes. With each client their get a picture of them, and their plush posted, as well a link to whatever gallery they want.

Dragon Bag

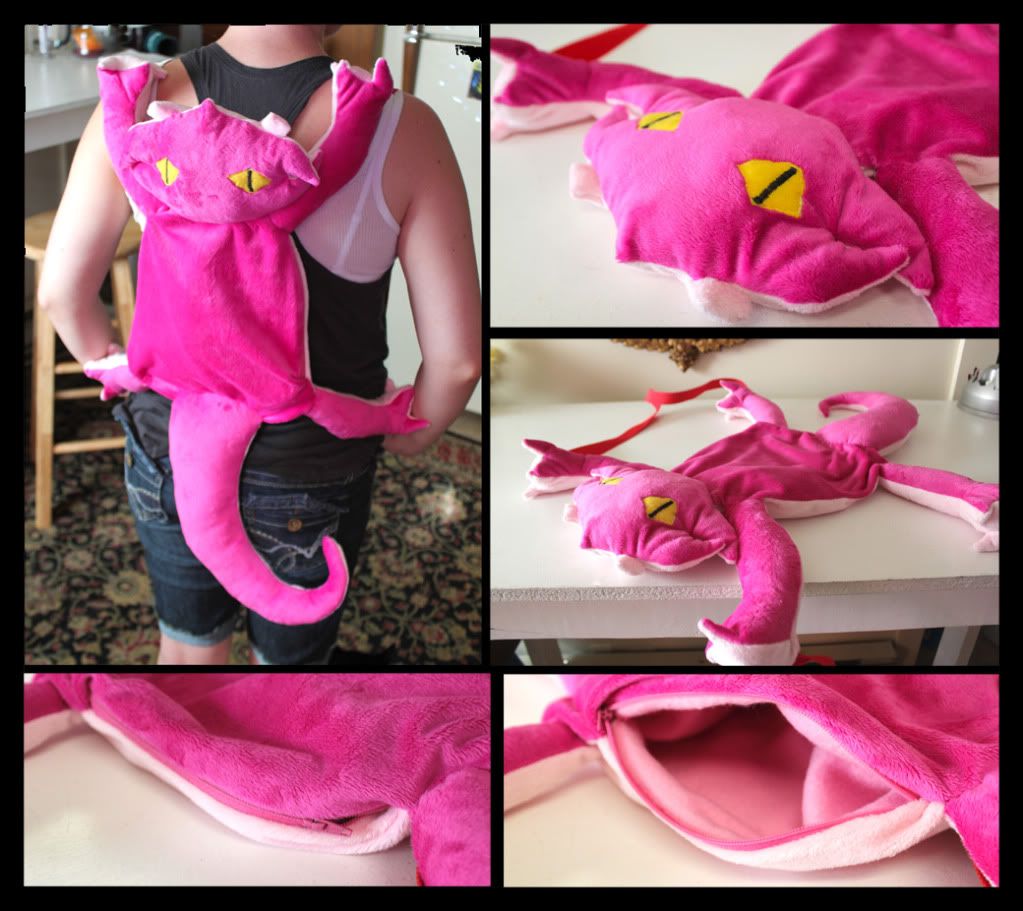
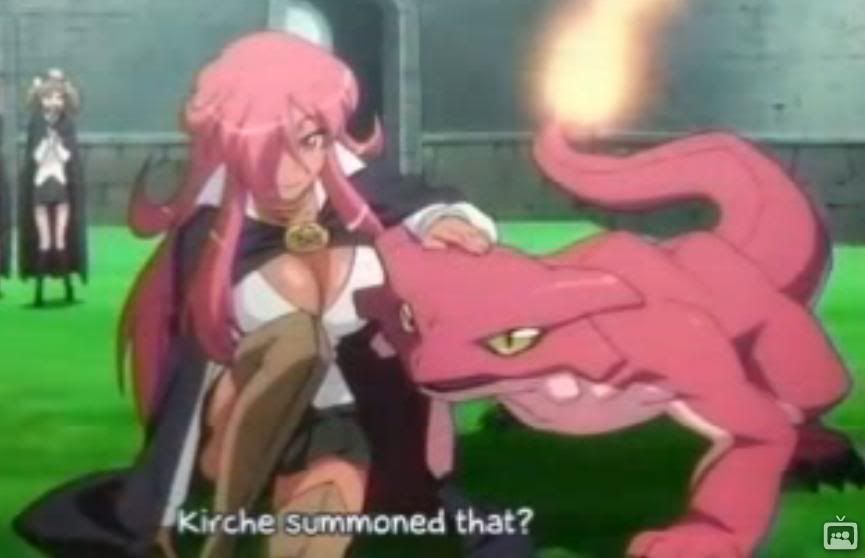
This was based off an anime character...but I was never really given the name of the anime of the character. But they wanted the dragon as a plush, but rather then a regular plush they wanted a bag to be made out of it. I had never made a bag before, so it was a fun experiment.

Photobucket

They also requested that I use a different material. Instead of the normal anti-pill fleece I use, I was asked to use a minky-fleece. This is much softer and has a really small fur like appearance to it. I LOVE how it felt. My only complaint with working with it, is that the fur can sort of get everywhere. But once it was all sewn up, I was pretty pleased. Everything came together easier, the cut and patterns were perfect. Probably one of my favorite looking projects.

Photobucket

The inside of the bag is my normal anti-pill fleece, so it was super soft. The body isn't stuffed, to avoid making it look too thick, also so stuff could be put inside the bag. It has a simple zipper so that you can open and close it.

For my first bag I am very pleased with the results. I might have to make more in the future.

Enryu (GaoGaiGar)

It's been a while since I updated! I have several new plushies I can add. I plan on doing entries for each one. First we'll start off with another robot.

Photobucket

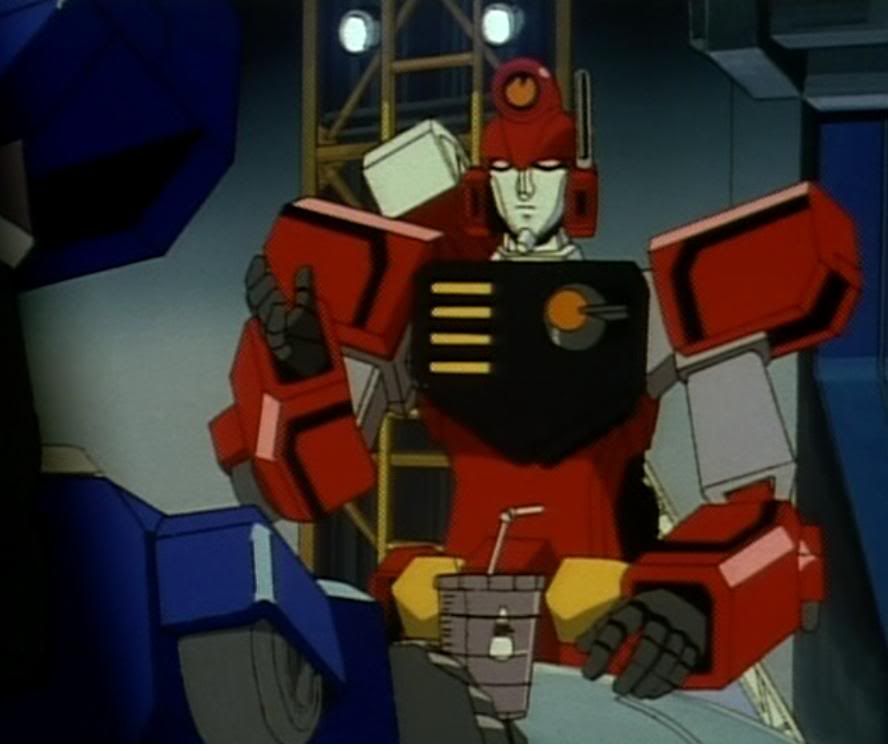
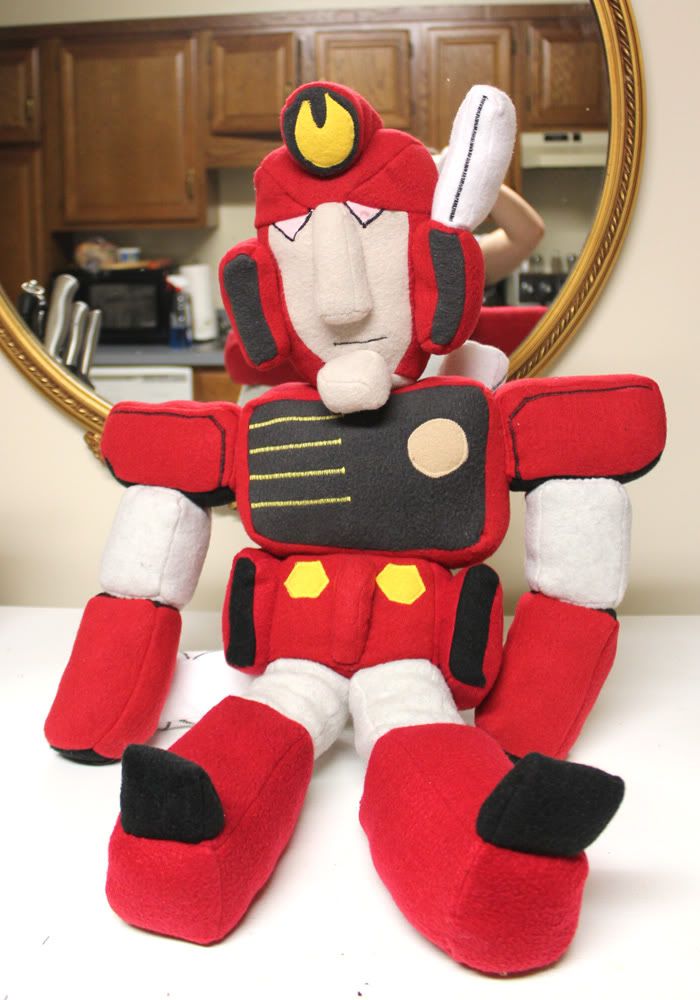
After making the first Transformers plush I was contacted to make another robot plush. This one was a bit more difficult then the previous. I think I had a bit of a harder time putting together the pieces. I had a few somewhat alright references to work off of when making him. This was also a series I had never heard of before, so I just had to go off of what I had from the client.

Photobucket

He took me a bit longer to finish then most of my other ones. Mostly because I kept running out of supplies! But the client was really rather wonderful. He stands a bit larger then my Transformers plush, probably over 2ft in height. Pretty much of the right size and height for cuddling!

Friday, July 15, 2011

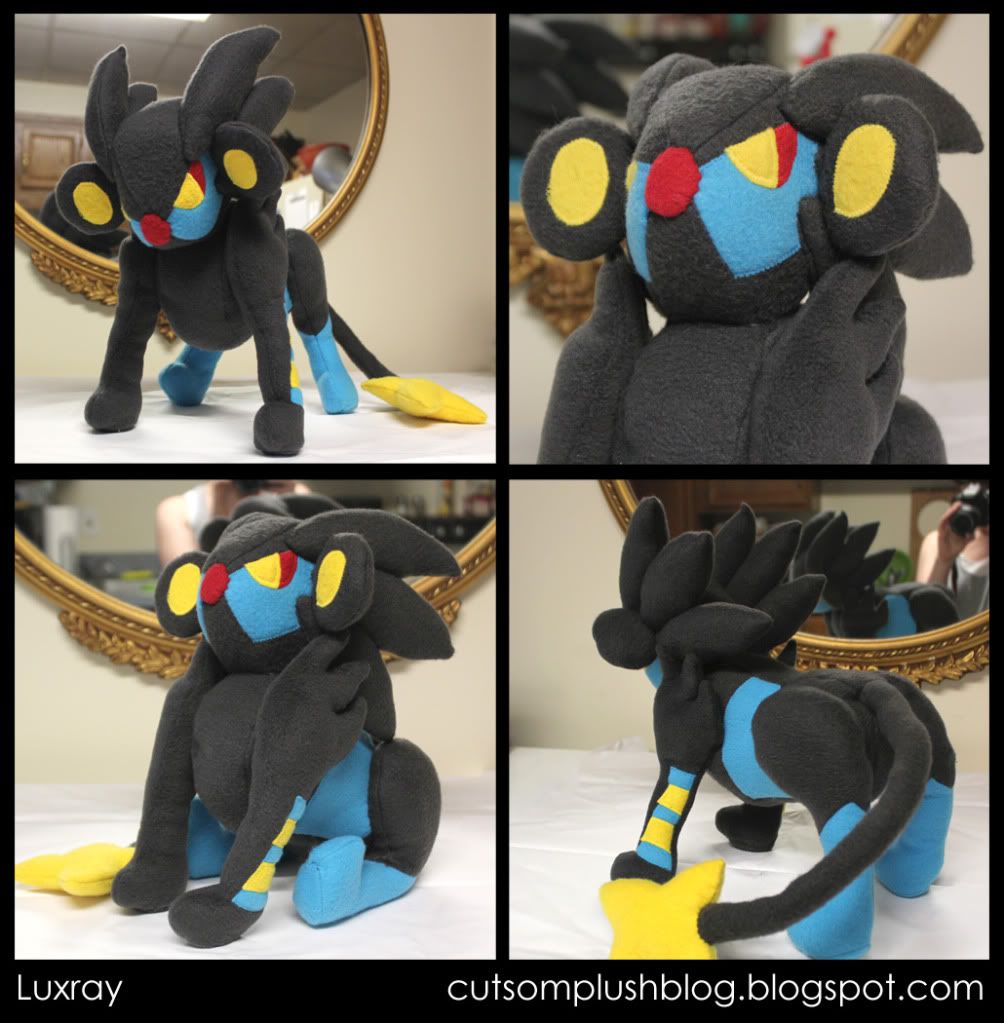
Luxray (Pokemon)

Photobucket

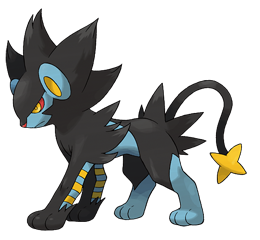
This is my first Pokemon plush, which is rather surprising because most of the other commissioners I know get a lot of requests for Pokemon. I think its mostly because I'm known for robots, which is fine, I love my robots. But working on Luxray was actually a lot of fun. The shape was pretty basic, but it had some interesting parts to him.

Photobucket

His head reminded me of Sonic the Hedgehog. I thought of making it all one piece, but it ended up working better as three pieces and then they're sewn together up till a certain point, so they all spike outwards.

I chose to make the legs seperate parts because the front legs had a spike part coming out. It was easier to make them different pieces then try and figure out how to make it all one piece. It worked out rather nicely because the legs are strong enough to support him to stand, as shown, but he can also sit down on his hind legs. The applique on the legs was a little annoying. Not really tough to do but doing little applique work is always a little annoying.

The tail of course has a wire in it, so it can be posed and bent. It's getting easier and easier to stuff them. And I like the touch of the wire to bend and pose the tail.

Monday, July 11, 2011

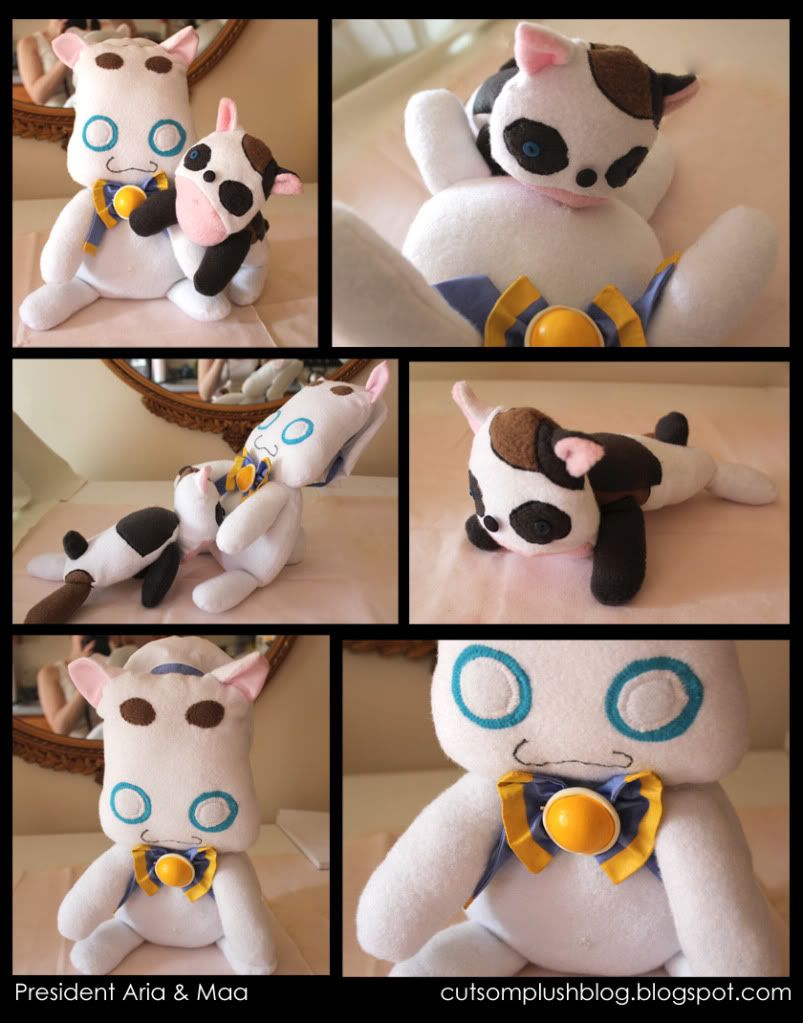
President Cats (Aria)

Photobucket

A dual commission this time, a client commissioned two cats from an anime Aria to go with their cosplays. But they wanted them the one to be able to bite down on the others stomach. Another anime I didn't know too much about but the designs for the cats are so, so cute! I think the bigger one is my favorite but the smaller one was pretty easy to make, because of how tiny he is.

Photobucket

Originally I was going to put magnets in them to make them stay but that didn't work out. They weren't really staying attached. So instead I sewed in a small clear clip and they clip to each other. The clips work out a bit better and the smaller cat stays to the bigger ones stomach rather nicely.

The bigger one, Aria, had a few cute pieces to it, which was exciting to work on. The hat and bow are made from a different material then the fleece, just a very light cotton fabric. The yellow parts were painted on. I could have sewn it on but it was easier to just paint it on, since the details were so small. The brooch in the center is made from sculpey, with a pin glued to the back and pinned onto the body, so they can be separated and taken off.

The little hat is made from the same material as the bow, but unlike the bow it's sewed onto the head. It was easier to work that way, and I couldn't figure out a good way to attach it without it falling off. So it's just sewed on top and stays on his head forever.

Saturday, July 2, 2011

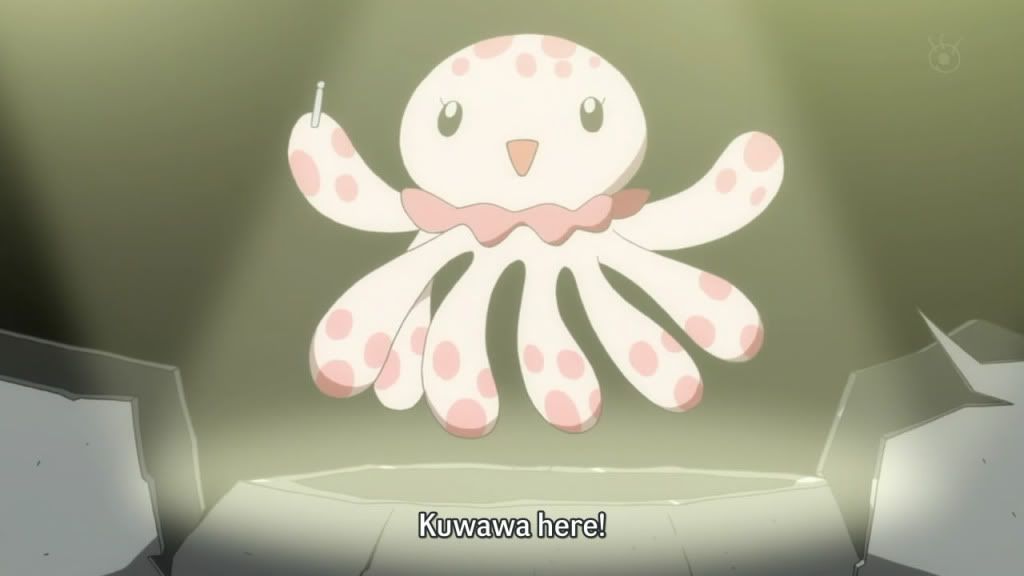
Clara (Kuragehime)

Photobucket

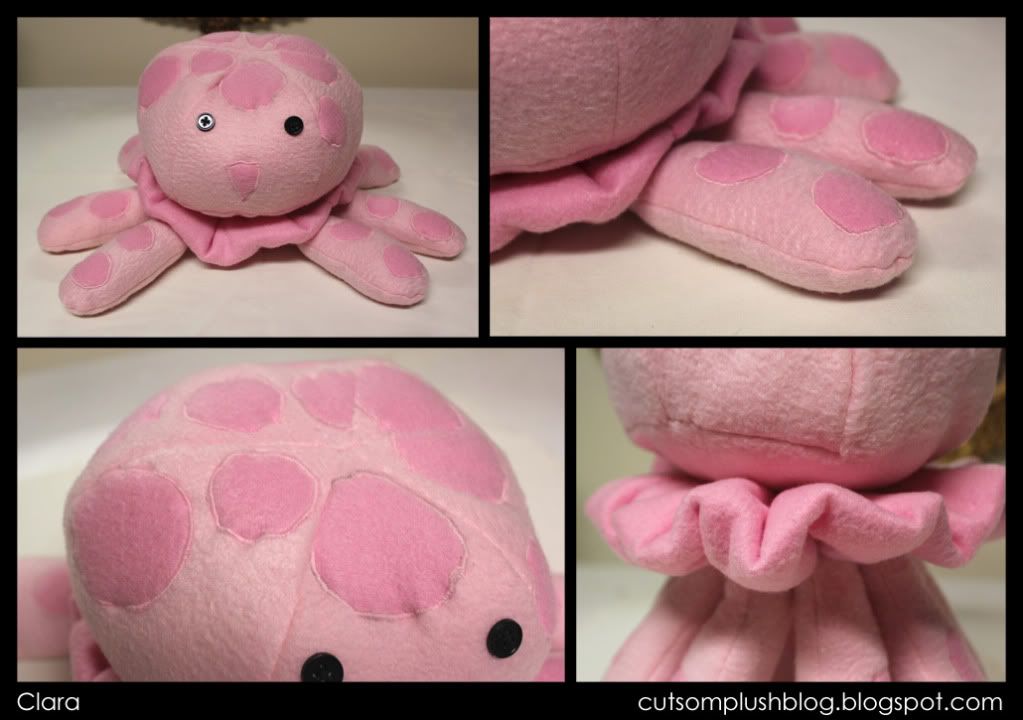
This by far has been my favorite project to work on. I've heard of Kuragehime and I've been really wanting to watch it for a while now, but haven't really gotten around to it yet. But for Otakon, a client wanted the jellyfish mascot type character for their cosplay.

Photobucket

I only had to work in two colors, which was such a nice break from Tracks, having to switch between different all the different colors. But what was the big time consuming part of this project was all the circles on her head and arms. I ended up appliqueing each part on, I even ran out of thread at one point while doing this. It wasn't really difficult to do, but it was the part that look up most of my time, and I got just a bit more practice with applique.

I think my favorite part is the ruffle detail. Its really nothing more then a ruffle made from the fleece material. Simple and sewn around the circumference of the doll. Then the legs are sewn under that. What I really love about this, is that the legs are set up well enough so it can actually stand up on its own! And I love it when I can make a plush stand up.

Other then that I really can't say too much about this one. The shapes are really basic so it was easy to sew, and the eyes are of course buttons. Since its eyes are simple little dots I could really easily pull it off.

Friday, July 1, 2011

Tracks (Transformers)

Photobucket

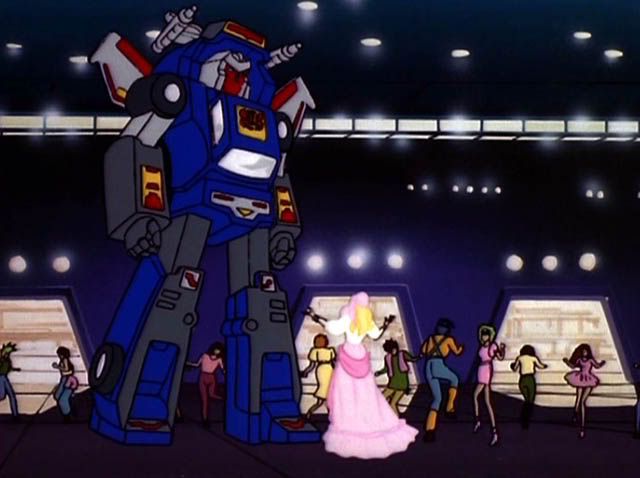
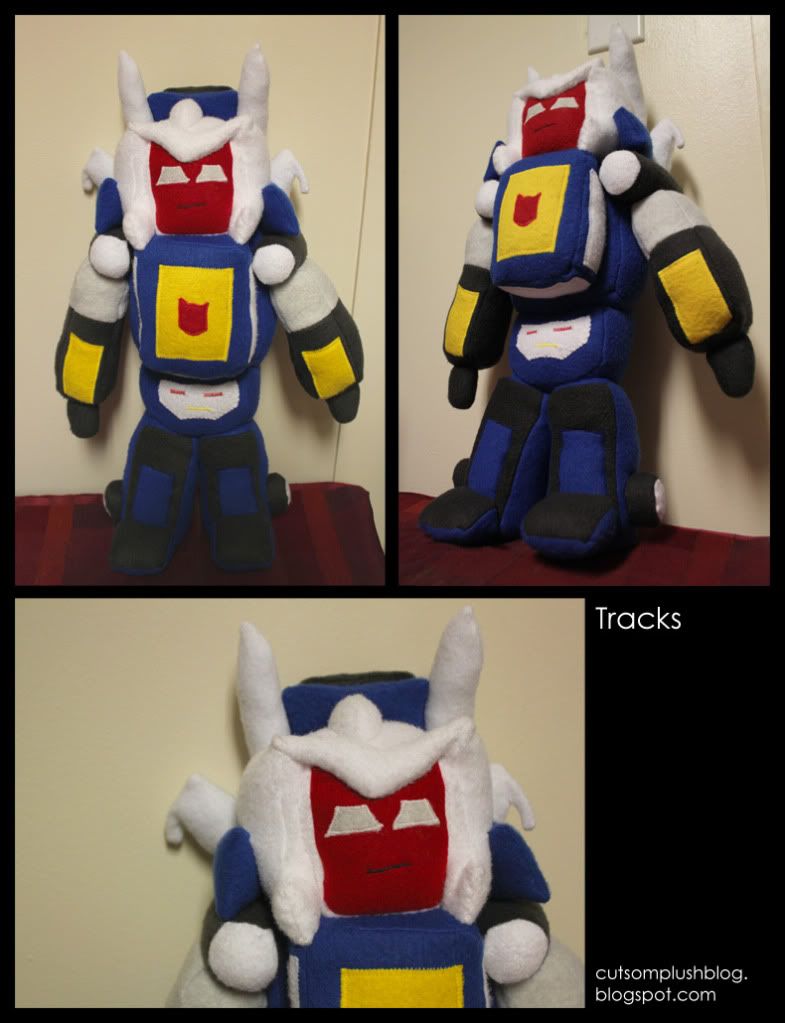
I really never watched Transformers when I was younger, so I really didn't know a lot of the robots. But I had a commission for this Transformer, Tracks and it was right up my ally. I am sort of a robot plushy expert.

Photobucket

This robot had more details on him then I'm used to, so I had to find a way to use all the detail that was there but still simplify it so it could be made into a plush. I was honestly more worried about the head then anything else, but I'm happy with the end result of the head. it reminded me of a Gundam.

There was a lot of little embroidery and applique parts to his body and arms. After a while it was starting to feel like really constructing a robot with the number of parts he had to him; the head, chest, torso, arms, legs, wings...
It's amazing how complicated these ones can get. Even though he's only a few colors, majority red and white, having to constantly switch threads and go between fabrics made the project a bit more time consuming.

He's one of my bigger ones, probably even a little taller then Lockjaw. The client asked for about 16inches but he ended up being closer to 18inches at the very tip of his head. He's also one of my few that can't really stand up on their own. He's too top heavy, I needed to lean him up against the wall to get him to stand. Which was fine, he's meant to be held rather then stand. From what I understand it's part of a cosplay, so the person can hold him. The way he's sewn he can sit down to some degree, with his back propped up against the wall.

Friday, June 24, 2011

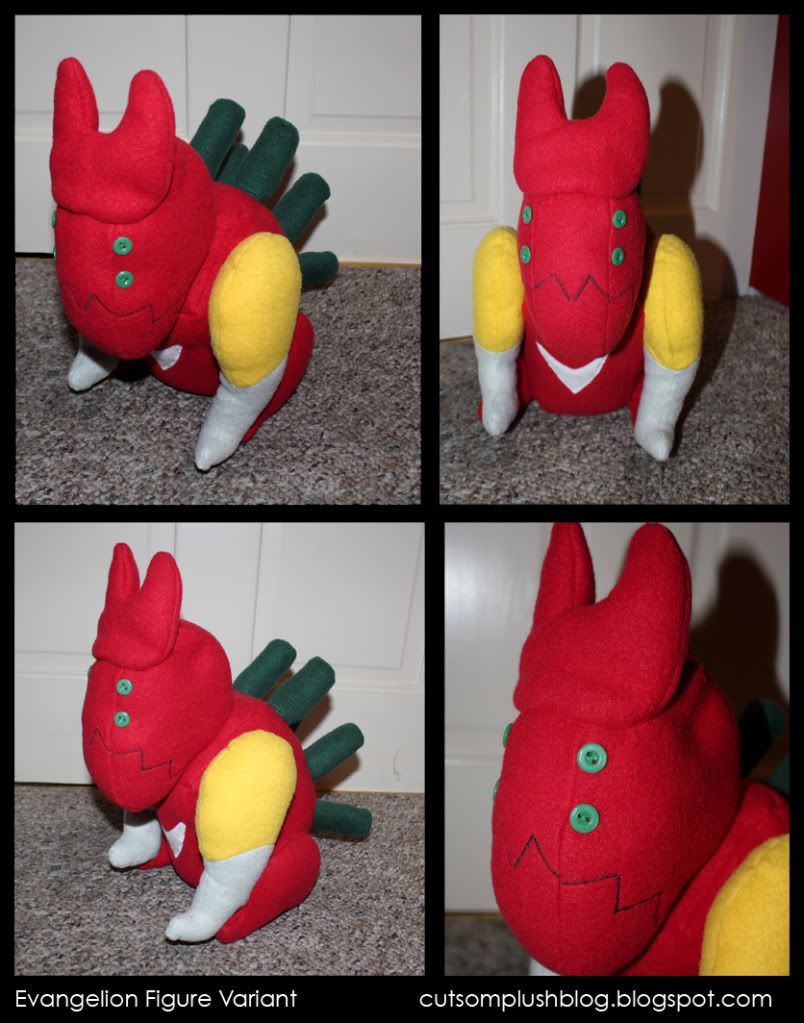
Evangelion (Neon Genesis Evangelion)

Photobucket

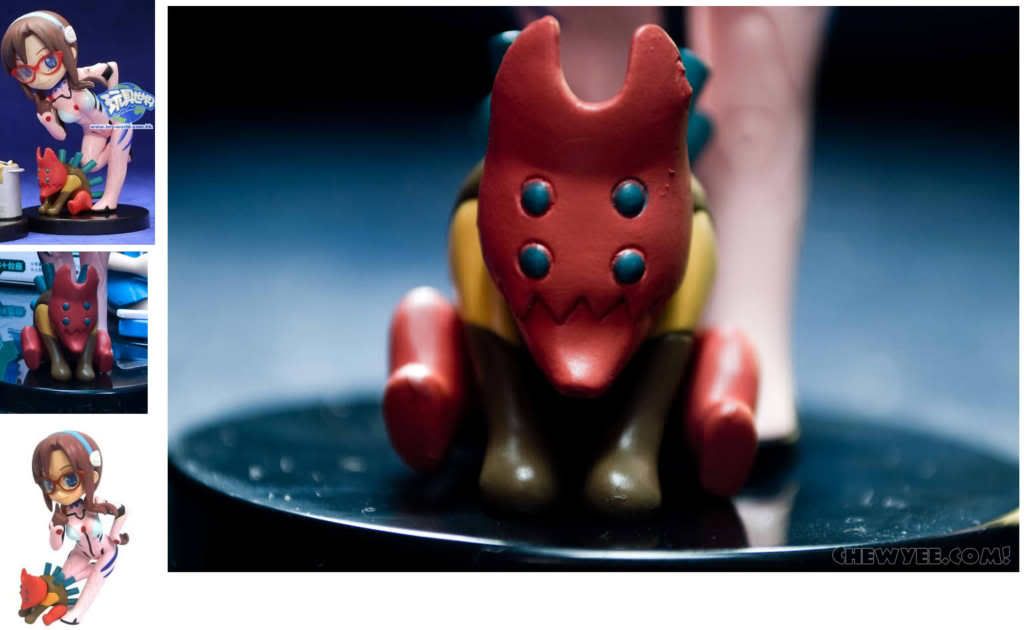
Another robot! But this one is a bit different. Rather then base it off it's original design the client asked me to make it based off of a figurine.

Photobucket

The client wanted it to go with the cosplay and probably something a little bit more cute. There was a few changes that I was asked to make, to try and make the colors a bit more like it's original design.

Photobucket

The shape and form was much simpler then the process I'd go into making a normal robot plush. In this case I tackled it more like an animal, because the shape reminded me more of a cat or dog hunched over. The bottom legs have the same shape as Lockjaw. The eyes are buttons of course, if I can include buttons I will. For the shape of the face, I thought it be simpler if I made the odd antenna looking part on top of his head a separate piece and then attach it, which I'm pleased with the shape.

The mouth is basically just sewn on, because it would be easier to match up and sew, plus it allowed the mouth to stand out more.

Probably the most tedious part was making the tubes on his back. Most of it had to be sewn by hand and then attached by hand. It's not difficult, just a bit repetitive, and it can really cause a cramp in your hand!

Wednesday, June 22, 2011

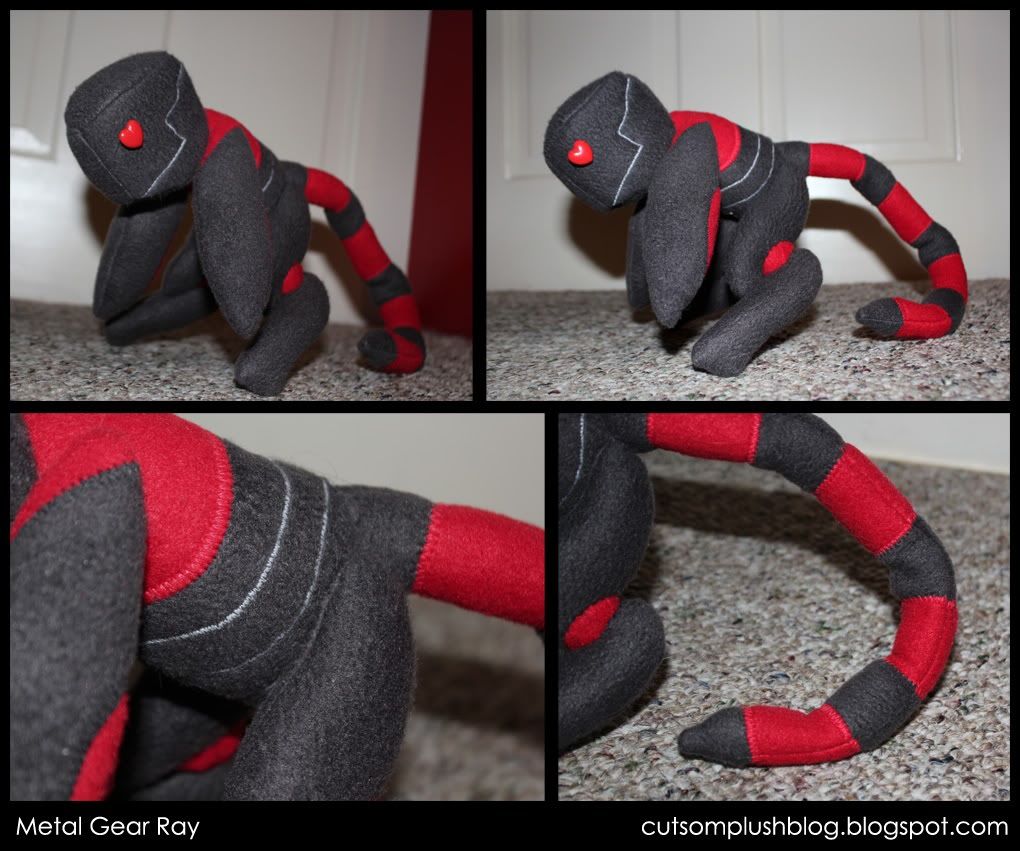
Metal Gear Ray (Metal Gear Solid 2)

Photobucket

It's been a little bit since I posted. I was hunting down for more commissions and I got a sizable list, so I started working! The first one on that list was Metal Gear Ray. I had been wanting to make him for a while, since I made Rex, but I really never had the chance or opportunity. But then someone commissioned me for Ray and I was all too excited to make it.

Photobucket

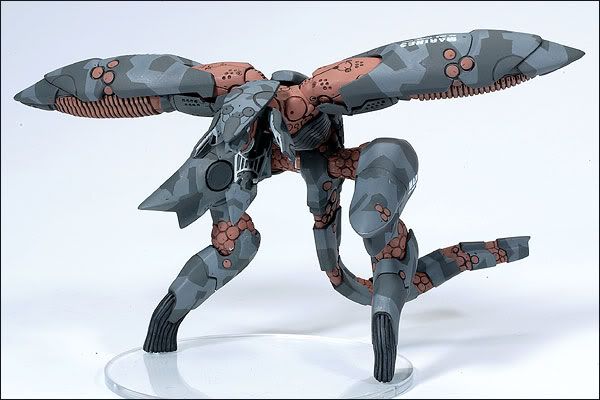
Ray was interesting, because his shape is so different. Rex I could break down into a lot of square or rectangle shapes, but Ray was a bit more round and organic in shape. He had a bird/aquatic type shape to him. The hardest part to figure out was what I was going to do with the face. His face was broken up into so many parts, I just ended up simplifying it into one square shape sewing in a design to replicate the mouth. The heart buttons are left over from when I was making a bunch of Rex, and they add and extra cute touch to him.

I chose a brighter red color because that particular shade of organish-red wasn't really easy to find, so I had to make due and go with a brighter red instead.

The tail has a wire in it so it's bendable and posable. It also acts as support for the body so he could stand on his feet. I chose to tilt his wings down rather then up for balance, so he could actually support himself and stand on his feet, rather then fall over.

Overall I'm pretty happy with how he turned out! I wish I had a Rex around to take photos of them together.

Monday, May 30, 2011

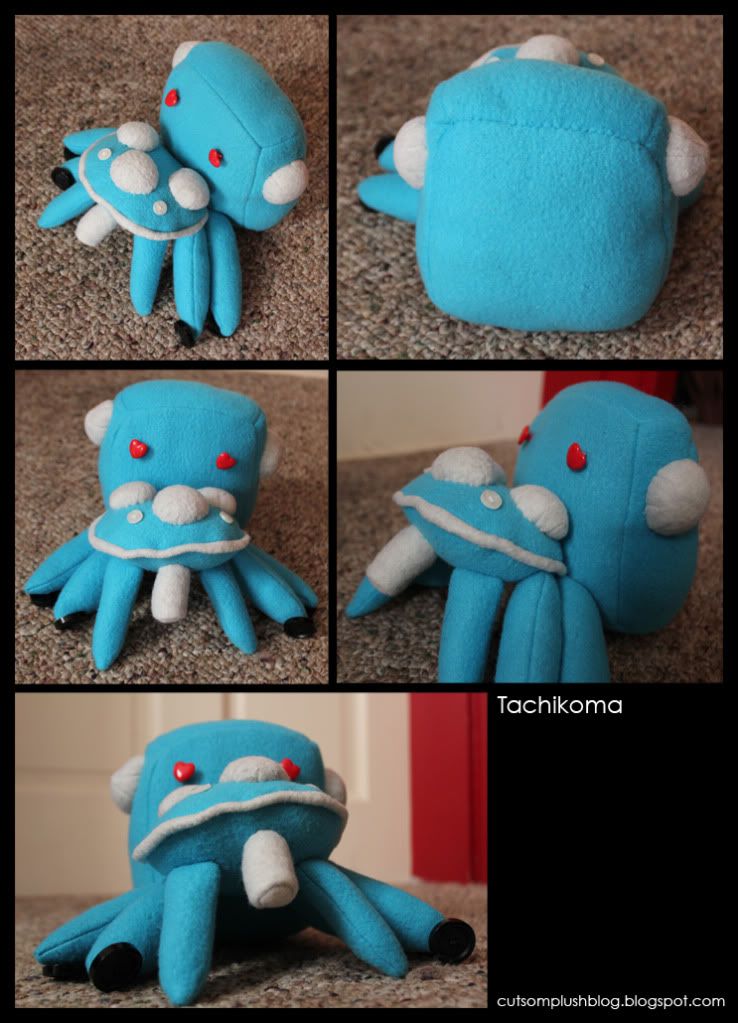
Tachikoma (Ghost in the Shell)

Photobucket

My first non-commission in a while. I started Tachikoma a while back, but then was backlogged with commissions so I had to stop. But now that I had a bit of free time on my hand I got back to work on him. I originally decided to make him because I had a few requests for him, and I had all the materials I needed laying around.

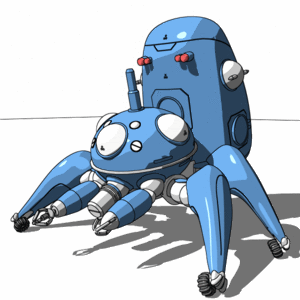
He's a bit on the smaller side, a little smaller then I normally make. He's about 5" tall, at the top of the back part. He has a lot of little details to him, stuff that I had to omit because it would have been too much to do, or would have cluttered the small frame. The basic frame consisted of the round head, back base and then the legs/arms.

Photobucket

The head is two round shapes, and the material was sewn together to have it stick out like that. the buttons act as the smaller details on it. The buttons on the legs act as the wheels on his legs. The choice of the heart buttons was really meant for it to be more cute. I have a ton of these heart buttons sitting around and I wanted to take advantage of it. The smaller circles are all half circles sewn with the same shape, the same dome shapes that he has. A lot of the minor details like the claws I had to omit because of how small it was.

His little arms and legs remind me of an octopus. I should make myself a little army of Tachikoma's for my desk!

Friday, May 27, 2011

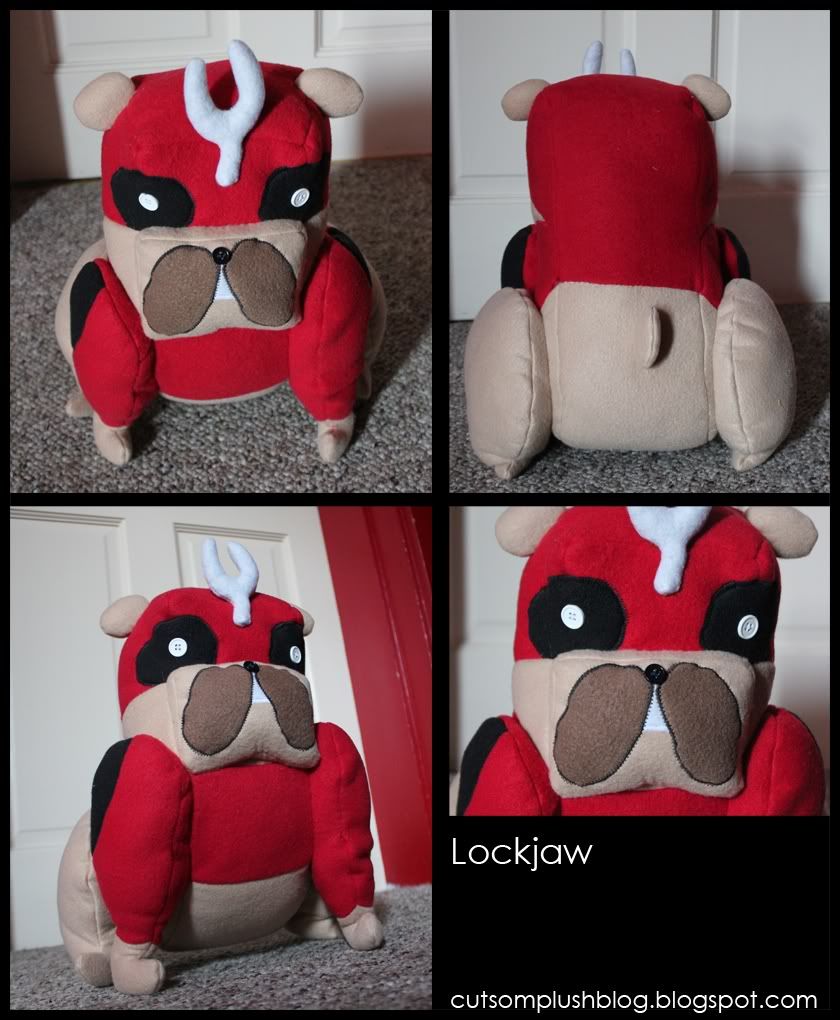
Lockjaw (Marvel Comics)

Photobucket

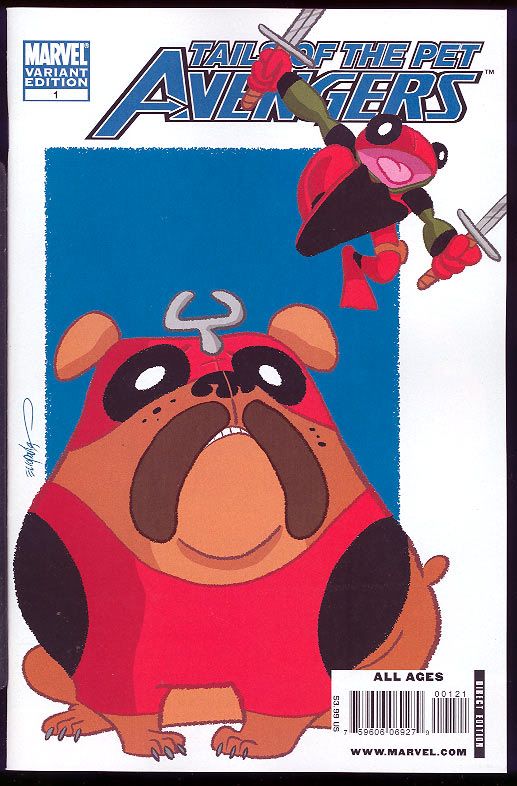
I'm not really a big comic-book fan, so I don't really know much about comic characters. I was commissioned to make this bulldog character Lockjaw, dressed as Deadpool like this issue cover. My main reference is this cover issue of this comic, but I gathered a few others so I could get the right shape and body.

This is actually one of the biggest plushies that I've made in a while. He's about 14 inches in height. I was trying to go for something accurate so the person could use him for a cosplay prop. But working in bigger sizes make it easier for sewing.

Photobucket

Both legs are separate pieces that are sewn onto the body. I had to create a "mask" and "shirt" for him, the mask was all one piece was the shirt was appliqued to the body. Both the eyes and nose are buttons, sort of a semi cute touch I wanted to add. The eyes were perfect sized for the little eye-holes he had, so I couldn't resist adding the buttons. Also the ears and the tail are the same pattern piece, since they're both so tiny.

The weird antenna thing was part of his character design, it's just stuffed and sewn on. And I honestly almost forgot about it until I looked at my references again. It's such an odd little thing to put on him, but not difficult to sew.

I had to create a muzzle for him, since bulldog's don't really have super pronounced muzzles, I just created a small triangle shape in the same width/height as his mouth, made it so I could easily applique the brown parts on the mouth.

Monday, May 23, 2011

Wheatley (Portal 2)

Photobucket

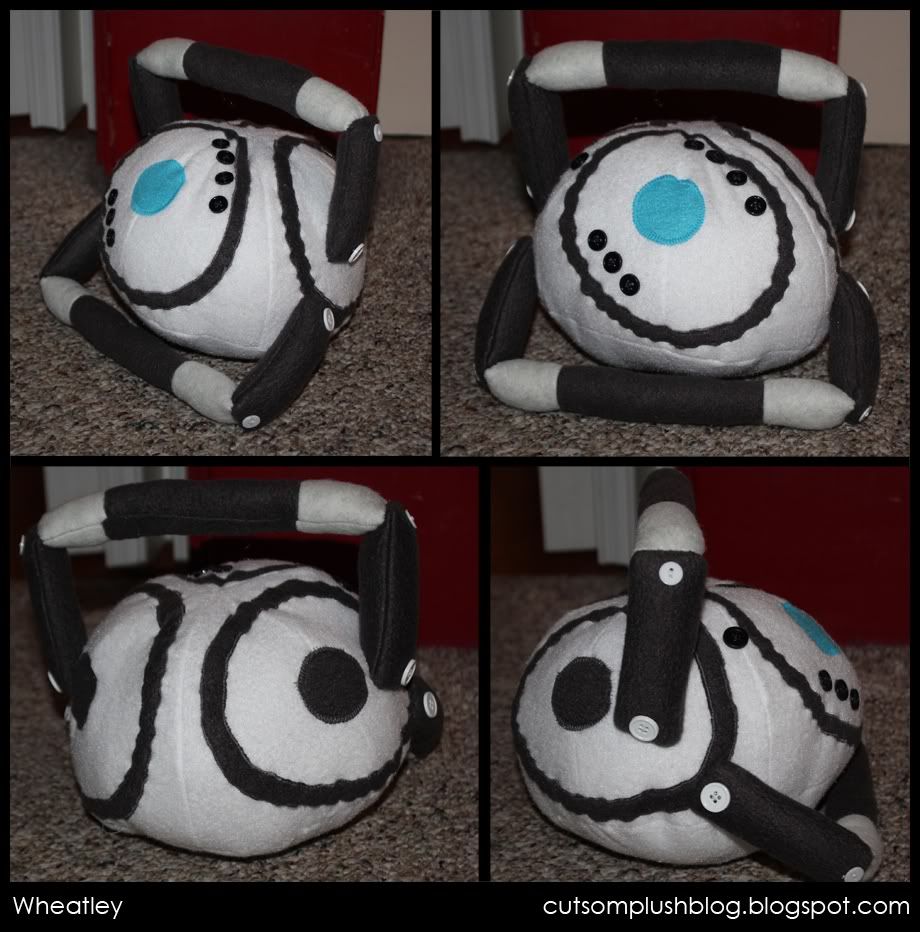
And the last of my Portal commissions are finished. This one was probably the most difficult. Round shapes are the most awkward to work with. If there's anything that needs to go on top there's nothing flat to work off of. And he had so many little details on him I had to try to work out.

The round shapes, the circles and the eyes were all appliqued on, which of course were all time consuming and really careful work. The buttons were added for the smaller circles that he has on his face and on the odd arm like things. The buttons were really nothing to sew on, but they add some variety.

The handles don't really add support, the shape is good enough to stay up on it own, but the handles are part of his design. The top part stay up pretty much on their own, they're just stuffed and sewn onto the shape. And that was pretty much it. The shapes were pretty basic, but the applique ended up making it more difficult.

Photobucket

Now off to the next commission! This time a more obscure character.

Saturday, May 21, 2011

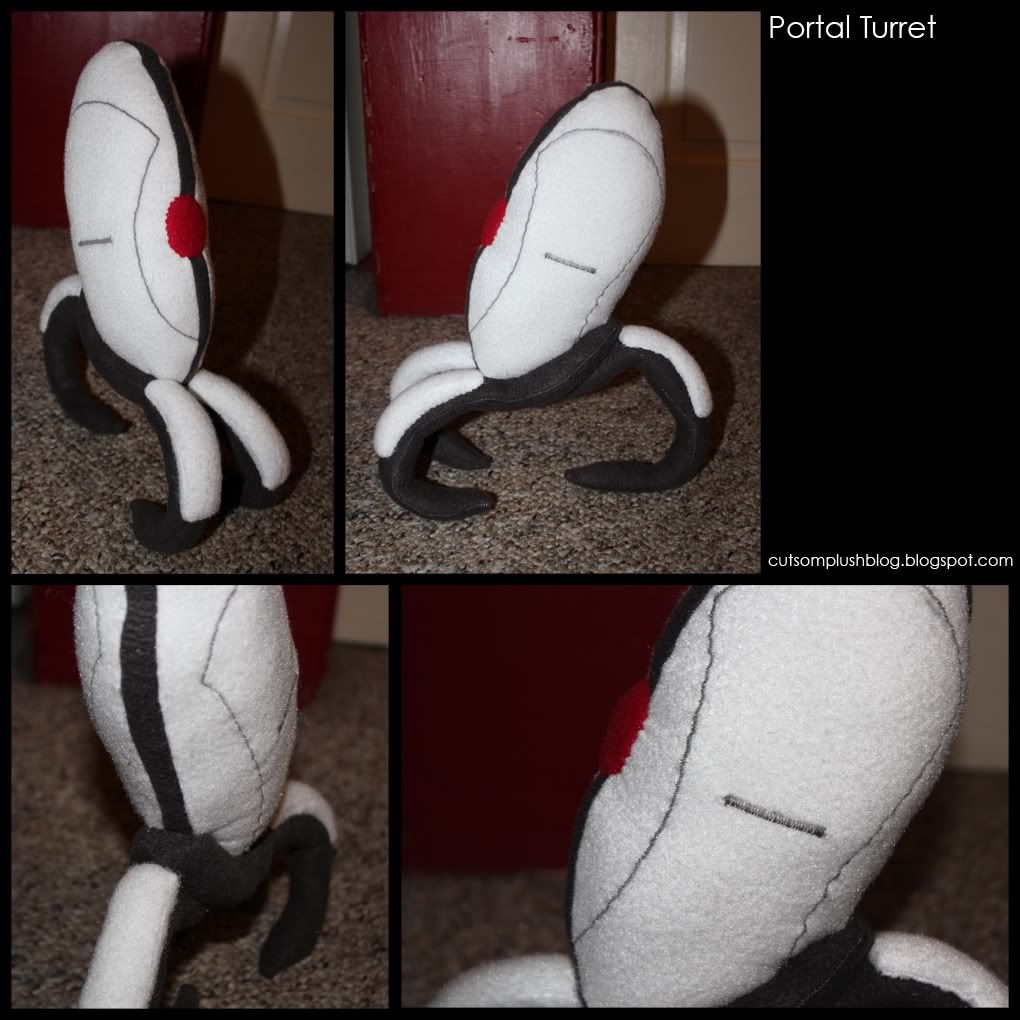
Turret [Portal]

Photobucket

Another commission, this time for the turret from Portal. Despite it's simple shape, it had a lot of little difficult details. I didn't have trouble making the little embroidered details along the body. It came down to the black stripe along its body. I tried several different methods before I came to the one that I like best, which was sewing it with the white body. Then began the difficult part again, which was attaching the legs to the body. It was a fairly simple ladder stitch to hold it together, but I was pretty happy when he was able to stand all on his own. The legs have wires in them so they're completely bendable. The wires are only in the legs, so the rest is very soft, and even in the legs its stuffed, so you can't really feel the wire.

Photobucket

I did sacrifice a bit of accuracy with the legs by making them bend a bit, so they could support the weight of the body. And the body tilts back a bit too because of that, of how it sits. But again, I'm alright with sacrificing a bit of that accuracy. This is part of a two plush commission order from one person. Off to the next Portal plush!

Wednesday, May 18, 2011

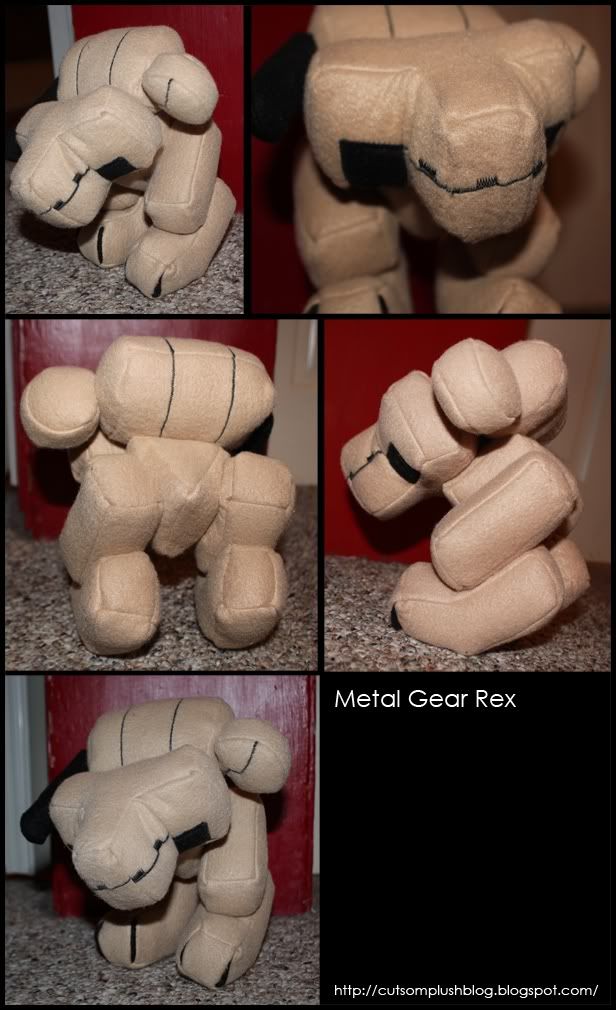
Metal Gear Rex [Metal Gear Solid]

Photobucket

I made Rex for myself last year and sold him off on my etsy. But I had a commission to make him again. This time it took far less time to make because I already had the patterns made up, and all the spare fabric sitting around. I really didn't need to make any kind of adjustments. There was a few pattern pieces I needed to remake but otherwise it was fairly easy to do again.

Photobucket

Rex has a lot of parts to him, but he's basically a bunch of square shapes that are put together. I basically had to take him and break him down into really simple shapes. I was really glad that my patterns from last year still worked out really well for him a year later. The stitching detail helps breakup the tan looking fabric that I used. What's even nicer is that he actually stands up on his own. He has a lot of detail to him, so it's tough to sort of break him down and try and simplify him for a plushy. Hopefully I can work on Metal Gear Ray soon!

Tuesday, May 17, 2011

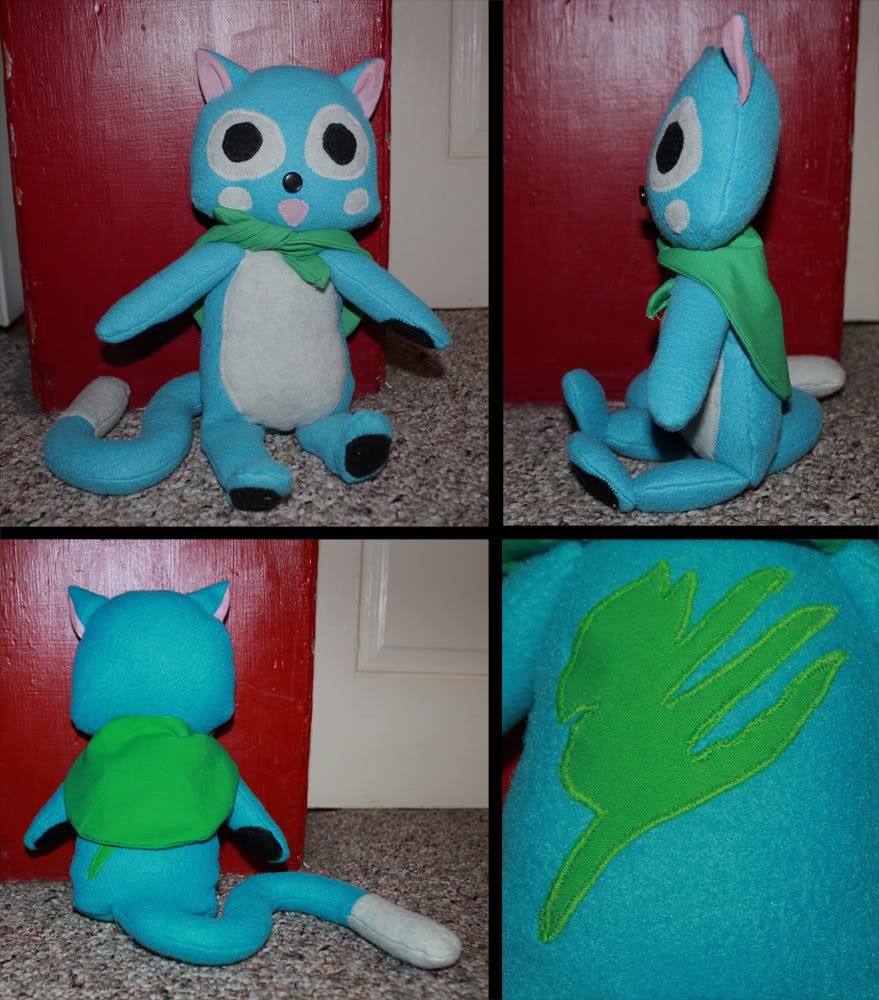
Happy (Fairy Tale)

Just finished up a commission for a character Happy (Fairy Tale). I don't really know much about the series, never really saw it before now, but the character was rather cute so I was excited to work on him.

Photobucket

Photobucket

The general shape was pretty easy it was all the little details. Like the stomach, face and the mark on his back. The mark on his back was actually the most difficult, because of the level of detail. I ended up just using heat 'n bond to keep it down then applique it. I ended up just appliqueing everything on the body. And I was able to make his little backpack as an actual mini bag. The nose is a button, because I figured that would look cute, and I like adding buttons to plushes.

Photobucket

Overall a pretty easy project. It only took two days to pattern and then sew up, I'm pretty pleased with the overall results. Off to work on my next commission!

Sunday, May 15, 2011

Intro

Hey there guys. I decided it would probably be best to move all my plushy works to its own blog. It be easier to control and contact, and show off my different projects. Each project will have a gallery view to check out the different photos. And the different posts will break down how I made it and what went into the project. Thank you and enjoy your stay here!